UserDefaults & CoreData
UserDefaults와 CoreData로 디바이스에 데이터를 저장해보자.
UserDefaults와 CoreData는 둘 다 디바이스에 데이터를 저장할 수 있는 기능을 제공해준다.
둘의 차이점과 장단점, 사용방법에 대해 간단히 정리해보자.
UserDefaults?
애플의 개발자 문서를 참고하면
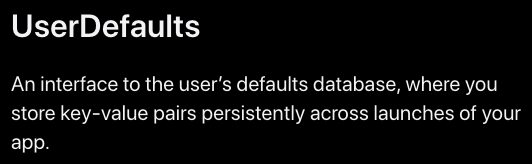
앱을 실행하는 동안 지속적으로 키-값 쌍을 저장하는 사용자의 기본 데이터베이스에 대한 인터페이스입니다.
이라 정의되어있다.
키-값의 쌍을 저장하는 것을 보니 딕셔너리 구조라는 것을 알 수 있다!
UserDefaults 사용하기
사용하는 방법은 생각보다 쉽다.
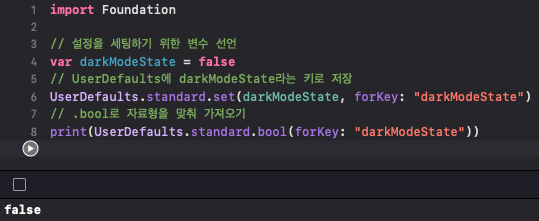
코드는 주석으로 설명해놨다.
UserDefaults는 Foundation에 있는 클래스이기 때문에 꼭 import해주자.
UserDefaults에 값을 추가하는 set()의 첫번째 인자에 저장할 데이터를 넣어주면 되는데, 첫번째 매개변수의 자료형이 Any인 set()이 있기 때문에 특별히 자료형에 구애받지 않는다.
이러한 특징을 가진 UserDefaults는 사용자 기본 설정과 같은 단일 데이터 값에 적합하다.
CoreData?
마찬가지로 애플의 개발자 문서를 참고하면

단일 장치에서 데이터를 유지 또는 캐시하거나 CloudKit을 사용하여 여러 장치에 데이터를 동기화합니다.
이라 정의되어있다.
CoreData는 앱에서 모델 계층 개체를 관리하는 데 사용하는 프레임워크이다.
CoreData에는 Persistenced, 변경 사항 Undo & Redo, 백그라운드 데이터 작업, 동기화, 버전 관리 및 Migration 기능을 제공한다.
우리가 데이터를 저장할 때 사용하는 기능은 Persistenced으로
Core Data는 개체를 저장소에 매핑하는 세부 정보를 추상화하여 데이터베이스를 직접 관리하지 않고도 Swift 및 Objective-C에서 데이터를 쉽게 저장할 수 있도록 합니다.
라고 정의되어있다.
CoreData 사용하기
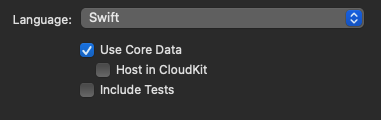
프로젝트를 생성할 때 Use Core Data를 체크하고 생성해준다.
체크를 안하고 생성한 프로젝트에 적용하려면 ApplDelegate 파일을 수정해 줘야한다.
lazy var persistentContainer: NSPersistentContainer = {
let container = NSPersistentContainer(name: "blogEx")
container.loadPersistentStores(completionHandler: { (storeDescription, error) in
if let error = error as NSError? {
fatalError("Unresolved error \(error), \(error.userInfo)")
}
})
return container
}()
새 파일을 만들듯이 data Model파일을 생성해준 후, 해당 소스코드를 AppDelegate에 추가해주고 이름을 똑같이 수정해주면 된다.
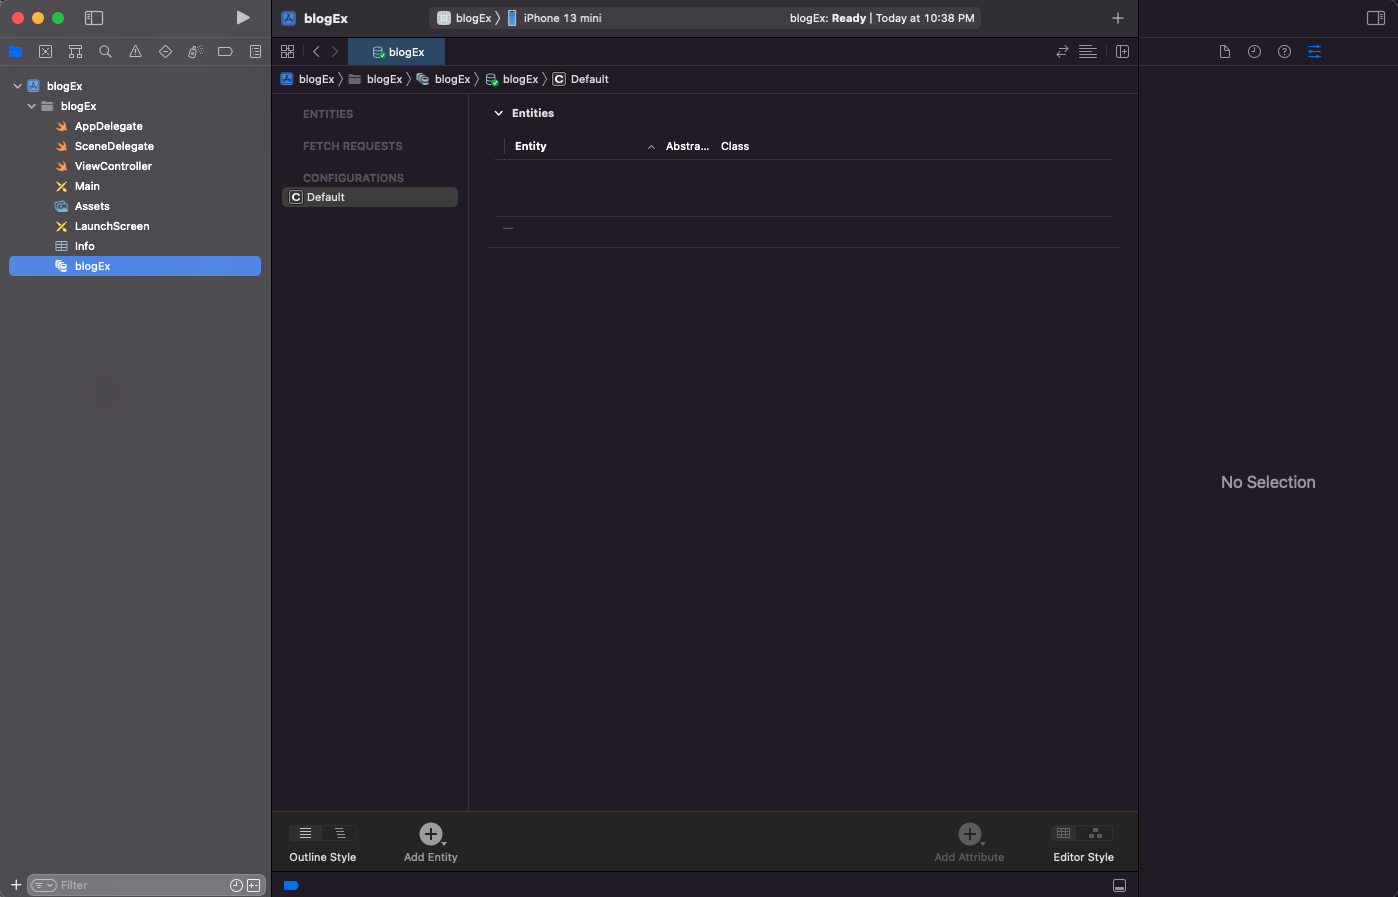
만들어진 data Model 파일을 열어보면 위 그림과 같이 생겼다. 아래에 있는 Add Entity를 눌러 새로운 엔티티를 생성해준다. 여기서 Entity는 CoreData에 저장될 객체를 의미한다. (예를 들어 최근검색어의 검색 객체.)
추가로 오른쪽 아래있는 AddAttribute 버튼으로 속성을 추가해 준다. 여기서는 테스트를 위해 id와 string을 생성해주었다.
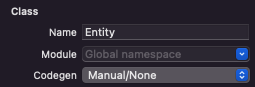
우리는 CoreData가 생성한 managed object subclass 및 프로퍼티 또는 기능을 편집할 것이기 때문에 Codegen속성을 바꿔줄 필요가 있다. 인스펙터에서 Codegen을 Manual/None으로 바꿔주자.
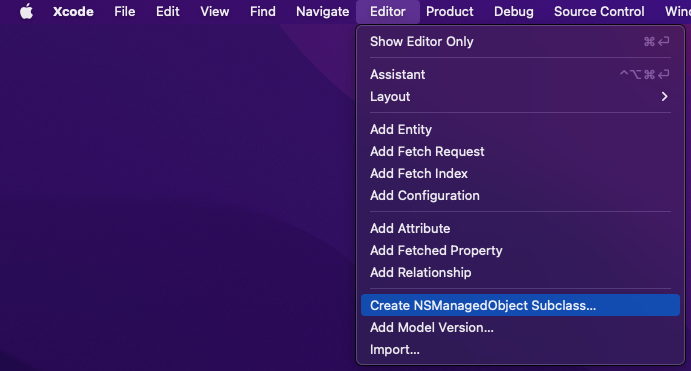
그 후 위 사진과 같이 Editor에서 Create NSManagedObejct Subclass... 버튼을 눌러 클래스 파일을 생성해준다.
그럼 우리가 생성했던 Entity의 extension을 xcode가 자동으로 만들어준다.
마지막으로 CoreDataManager 파일을 만들어 get, set, delete 등의 기능을 추가해 주면 끝이다.
아래는 CoreDataManager 파일의 소스코드이다.
import UIKit
import CoreData
enum CoreDataName: String {
case entity = "Entity"
}
class CoreDataManager {
static let shared: CoreDataManager = CoreDataManager()
private let appDelegate = UIApplication.shared.delegate as? AppDelegate
private lazy var context = appDelegate?.persistentContainer.viewContext
func saveEntity(id: Int16, name: String, completion: @escaping (Bool) -> Void) {
guard let context = self.context,
let entity = NSEntityDescription.entity(forEntityName: CoreDataName.entity.rawValue, in: context)
else { return }
guard let Entity = NSManagedObject(entity: entity, insertInto: context) as? Entity else { return }
Entity.id = id
Entity.string = name
do {
try context.save()
completion(true)
} catch {
print(error.localizedDescription)
completion(false)
}
}
func getEntity(ascending: Bool = false) -> [Entity]{
var models: [Entity] = [Entity]()
if let context = context {
let idSort: NSSortDescriptor = NSSortDescriptor(key: "id", ascending: ascending)
let fetchRequest: NSFetchRequest<NSManagedObject> = NSFetchRequest<NSManagedObject>(entityName: CoreDataName.entity.rawValue)
fetchRequest.sortDescriptors = [idSort]
do{
if let fetchResult: [Entity] = try context.fetch(fetchRequest) as? [Entity] {
models = fetchResult
}
} catch let error as NSError {
print("Could not fetch: \(error), \(error.userInfo)")
}
}
return models
}
func deleteEntity(id: Int16, onSuccess: @escaping ((Bool) -> Void)) {
let fetchRequest: NSFetchRequest<NSManagedObject> = NSFetchRequest<NSManagedObject>(entityName: CoreDataName.entity.rawValue)
do {
if let results: [Entity] = try context!.fetch(fetchRequest) as? [Entity] {
if results.count != 0 {
context?.delete(results[Int(id)])
}
}
} catch let error as NSError {
print("Could not fatch🥺: \(error), \(error.userInfo)")
onSuccess(false)
}
contextSave { success in
onSuccess(success)
}
}
}
extension CoreDataManager {
fileprivate func filteredRequest(id: Int16) -> NSFetchRequest<NSFetchRequestResult> {
let fetchRequest: NSFetchRequest<NSFetchRequestResult>
= NSFetchRequest<NSFetchRequestResult>(entityName: CoreDataName.entity.rawValue)
fetchRequest.predicate = NSPredicate(format: "index = %@", NSNumber(value: id))
return fetchRequest
}
fileprivate func contextSave(onSuccess: ((Bool) -> Void)) {
do {
try context?.save()
onSuccess(true)
} catch let error as NSError {
print("Could not save🥶: \(error), \(error.userInfo)")
onSuccess(false)
}
}
}
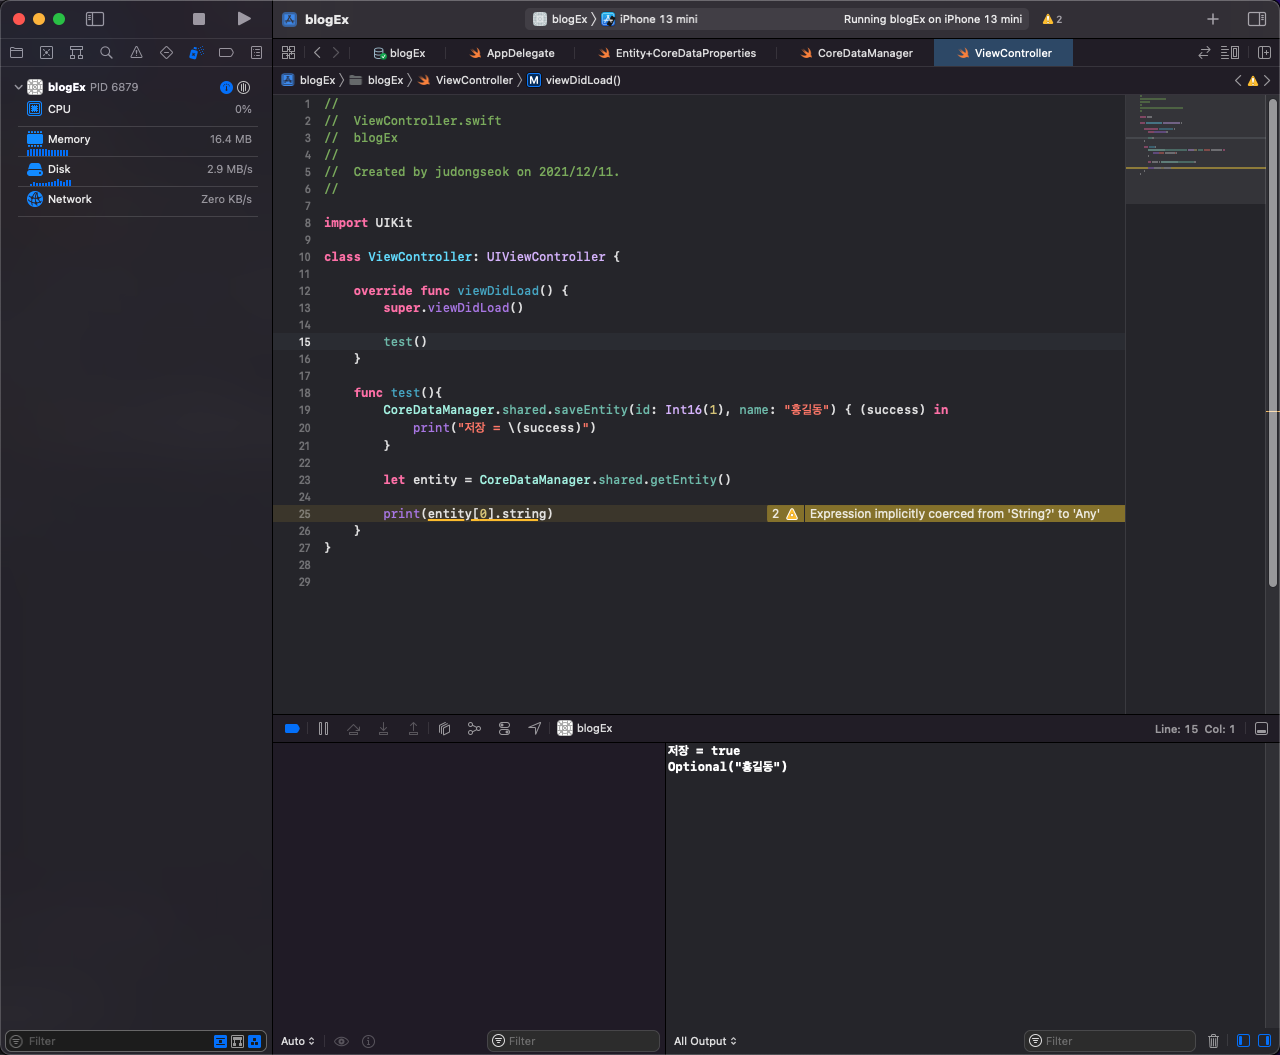
코드를 테스트해보면 잘 작동하는 것을 확인할 수 있다.
CoreData는 딕셔너리로 관리되는 UserDefaults와는 달리 데이터베이스가 기반이기 때문에 더 복잡하고 큰 객체를 다룰때 용이하게 사용될 것 같다.
참고자료